˗ˏˋ Design ˎˊ˗
Summary
This section will be me settling on a final plan and storyboard for my final piece. I have reached this point after the influence of my research, both contextual and artist, and my experimentation. I then go on to create concept art, and model these designs to be able to use them later on for animating.
It also goes through my design, modelling and animation process in Blender: using different add-ons, modifiers, techniques, textures, and shaders. All of these have been learnt by myself through tutorials and previous experience in my Year 2 projects. It will show how I develop from sketches on paper, to end up as 3D models, which are then animated, showing difficulties and problems along the way, as well as how I have solved them or overcame other problems in the entire project. This section follows LO3, LO4, LO5, and LO7, which shows my ability to create a creative response in correlation to my theme, and what I used in order to reach this.
⠤⠤⠤⠤⠤⠤⢤⣄⣀⣀⡀⠀⠀⠀⠀⠀⠀⠀⠀⠀⠀⠀⠀⠀⠀⠀⠀⠀⠀⠀⠀⠀⠀⠀⠀⠀⠀⠀⠀⠀⠀⠀⠀⠀⠀⠀⠀⠀⠀⠀⠀⠀⠀⠀⠀⠀⠀⠀
⠀⠀⠀⠀⠀⠀⠀⠀⠀⠈⠉⠙⠒⠀⠀⠀⠀⠀⠀⠀⠀⠀⠀⠀⠀⠀⠀⠀⠀⠀⠀⠤⠤⠶⠶⠶⠦⠤⠤⠤⠤⠤⢤⣤⣀⣀⣀⣀⣀⣀⠀⠀⠀⠀⠀⠀⠀⠀
⠀⠀⠀⠀⢀⠄⢂⣠⣭⣭⣕⠄⠀⠀⠀⠀⠀⠀⠀⠀⠀⠀⠀⠀⠀⠀⠀⠀⠀⠀⠀⠀⠀⠤⠀⠀⠀⠤⠀⡀⠀⠀⠀⠀⠀⠀⠀⠀⠀⠉⠉⠉⠉⠉⠉⠉⠉⠉
⠀⠀⢀⠜⣳⣾⡿⠛⣿⣿⣿⣦⡠⠀⠀⠀⠀⠀⠀⠀⠀⠀⠀⠀⠀⠀⠀⠀⠀⠀⠀⠠⣤⣤⣤⣤⣤⣤⣤⣤⣤⣍⣀⣦⠦⠄⣀⠀⡀⠀⠀⠀⠀⠀⠀⠀⠀⠀
⠀⠠⣄⣽⣿⠋⠀⡰⢿⣿⣿⣿⣿⣦⠀⠀⠀⠀⠀⠀⠀⠀⠀⠀⠀⠀⠀⠀⠀⠀⠀⠀⣼⣿⡿⠛⠛⡿⠿⣿⣿⣿⣿⣿⣿⣷⣶⣿⣁⣂⣤⡄⠀⠀⠀⠀⠀⠀
⢳⣶⣼⣿⠃⠀⢀⠧⠤⢜⣿⣿⣿⣿⣷⠀⠀⠀⠀⠀⠀⠀⠀⠀⠀⠀⠀⠀⠀⠀⢠⣾⠟⠁⠀⠀⠀⡇⠀⣀⡈⣿⣿⣿⣿⣿⣿⣿⣿⣿⣧⡀⠁⠐⠀⣀⠀
⠀⠙⠻⣿⠀⠀⠀⠀⠀⠀⢹⣿⣿⡝⢿⡄⠀⠀⠀⠀⠀⠀⠀⠀⠀⠀⠀⠀⠀⢰⡿⠋⠀⠀⠀⠀⠠⠃⠁⠀⠀⠙⢿⣿⣿⣿⣿⣿⣿⣿⣿⣿⣶⣿⡿⠋⠀⠀
⠀⠀⠀⠙⡄⠀⠀⠀⠀⠀⢸⣿⣿⡃⢼⠁⠀⠀⠀⠀⠀⠀⠀⠀⠀⠀⠀⠀⠀⠘⠁⠀⠀⠀⠀⠀⠀⠀⠀⠀⠀⠀⠘⣿⣿⣿⣿⡏⠉⠉⠻⣿⡿⠋⠀⠀⠀⠀
⠀⠀⠀⠀⢰⠀⠀⠰⡒⠊⠻⠿⠋⠐⡼⠀⠀⠀⠀⠀⠀⠀⠀⠀⠀⠀⠀⠀⠀⠀⠀⠀⠀⠀⠀⠀⠀⠀⠀⠀⠀⠀⢠⣿⣿⣿⣿⠀⠀⠀⠀⣿⠇⠀⠀⠀⠀⠀
⠀⠀⠀⠀⠸⣇⡀⠀⠑⢄⠀⠀⠀⡠⠃⠀⠀⠀⠀⠀⠀⠀⠀⠀⠀⠀⠀⠀⠀⠀⠀⠀⠀⠀⠀⠀⠀⢖⠠⠤⠤⠔⠙⠻⠿⠋⠱⡑⢄⠀⢠⠟⠀⠀⠀⠀⠀⠀
⠀⠀⠀⠀⠀⠀⠈⠉⠒⠒⠻⠶⠛⠀⠀⠀⠀⠀⠀⠀⠀⠀⠀⠀⠀⠀⠀⠀⠀⠀⠀⠀⠀⠀⠀⠀⠀⠘⡄⠀⠀⠀⠀⠀⠀⠀⠀⠡⢀⡵⠃⠀⠀⠀⠀⠀⠀⠀
⠀⠀⠀⠀⠀⠀⠀⠀⠀⠀⠀⠀⠀⠀⠀⠀⠀⠀⠀⠀⠀⠀⠀⠀⠀⠀⠀⠀⠀⠀⠀⠀⠀⠀⠀⠀⠀⠀⠘⠦⣀⠀⠀⠀⠀⠀⢀⣤⡟⠉⠀⠀⠀⠀⠀⠀⠀⠀
⠀⠀⠀⠀⠀⠀⠀⠀⠀⠀⠀⠀⠀⠀⠀⠀⠀⠀⠀⠀⠀⠀⠀⠀⠀⠀⠀⠀⠀⠀⠀⠀⠀⠀⠀⠉⠉⠉⠉⠉⠙⠛⠓⠒⠲⠿⢍⡀⠀⠀⠀⠀⠀⠀⠀⠀⠀⠀
⠀⠀⠀⠀⠀⠀⠀⠀⠀⠀⠀⠀⣀⠄⠀⠀⠀⠀⠀⠀⠀⠀⠀⠀⠀⠀
⠀⠀⠀⠀⠀⠀⠀⠀⠀⠀⠀⣬⣾⣮⠄⠀⠀⠀⠀⠀⠀⠀⠀⠀⠀⠀
⠀⠀⠀⠀⠀⠀⠀⠀⢠⣠⣴⣿⡿⣿⣧⣤⡀⡀⠀⠀⠀⠀⠀⠀⠀⠀
⠀⠀⠀⠀⠀⠀⠀⠨⢿⡷⣾⡿⢳⠿⣿⣶⣿⢖⠀⠀⠀⠀⠀⠀⠀⠀
⠀⠀⠀⠀⠀⠀⠀⠀⠀⠀⢸⣯⣏⣿⣿⠁⠀⠀⠀⠀⠀⠀⠀⠀⠀⠀
⠀⠀⢀⣀⡄⠀⠀⠀⠀⠀⣠⣿⡼⣾⣇⡀⠀⠀⠀⠀⠀⣀⠄⠀⠀⠀
⠀⠀⣾⢿⣱⠀⠀⠀⠀⣰⣭⣿⣿⣿⣿⣇⢀⠀⠀⠀⣐⣾⣿⠀⠀⠀
⣄⣦⣿⡿⣿⠷⣾⣿⣷⡟⣷⣿⣿⣿⣷⡟⣷⣿⣷⡾⣟⠿⣿⣤⣆⠄
⠙⠻⠿⣿⣏⣿⣷⠿⢿⢟⡏⣿⣿⣿⣟⣿⢟⡿⠷⣿⣻⣿⡿⠿⠋⠈
⠀⠀⠀⠩⢻⣿⡄⠀⠀⠈⠻⣼⣿⣿⡸⠋⠁⠀⠀⢸⡿⡓⠁⠀⠀⠀
⠀⠀⠀⠀⠀⠙⠀⠀⠀⠀⠀⢿⣿⣿⠃⠀⠀⠀⠀⠘⠉⠀⠀⠀⠀⠀
⠀⠀⠀⠀⠀⠀⠀⠀⠀⠀⠀⣺⣿⣿⡆⠀⠀⠀⠀⠀⠀⠀⠀⠀⠀⠀
⠀⠀⠀⠀⠀⠀⠀⠀⠀⠀⠀⣹⣿⣿⡇⠀⠀⠀⠀⠀⠀⠀⠀⠀⠀⠀
⠀⠀⠀⠀⠀⠀⠀⠀⠀⠀⠀⢹⣿⣿⠇⠀⠀⠀⠀⠀⠀⠀⠀⠀⠀⠀
⠀⠀⠀⠀⠀⠀⠀⠀⠀⠀⠀⣽⣿⣿⣀⠀⠀⠀⠀⠀⠀⠀⠀⠀⠀⠀
⠀⠀⠀⠀⠀⠀⠀⠀⠀⠀⢠⣿⢷⢿⣧⠀⠀⠀⠀⠀⠀⠀⠀⠀⠀⠀
⠀⠀⠀⠀⠀⠀⠀⠀⠀⢠⣿⣿⠋⢟⣿⣇⠀⠀⠀⠀⠀⠀⠀⠀⠀⠀
⠀⠀⠀⠀⠀⠀⠀⠀⣀⣿⣿⣫⣆⣮⣛⣿⡅⡀⠀⠀⠀⠀⠀⠀⠀⠀
⠀⠀⠀⠀⠀⠀⠀⠸⠿⣿⣿⣿⡄⣿⣿⣿⠿⠮⠆⠀⠀⠀⠀⠀⠀⠀
⠀⠀⠀⠀⠀⠀⠀⠀⠀⠸⢿⣽⣝⣽⣽⡿⠀⠀⠀⠀⠀⠀⠀⠀⠀⠀
⠀⠀⠀⠀⠀⠀⠀⠀⠀⠀⠙⢻⣿⣿⠛⠁⠀⠀⠀⠀⠀⠀⠀⠀⠀⠀
⠀⠀⠀⠀⠀⠀⠀⠀⠀⠀⠀⠀⠈⠁⠀⠀⠀⠀⠀⠀⠀⠀⠀⠀⠀⠀
⠀⠀⠀⠀⠀⠀⠀⠀⠀⠀⠀⠀⢀⣤⣶⣶⠿⠿⠿⣶⣦⣀⠀⠀⠀
⠀⠀⠀⠀⠀⠀⠀⠀⠀⠀⣠⡾⠛⠉⠀⠀⠀⠀⠀⠀⠉⠻⣧⡀⠀
⢠⣄⣀⣀⣀⣀⣀⣀⣀⣴⠋⠀⠀⠀⠀⠀⣴⣆⠀⠀⠀⠀⠘⣿⡀
⠀⠙⠻⣿⣟⠛⠛⠛⠋⠁⠀⠀⠀⠀⠀⠘⠿⠋⠀⠀⠀⠀⠀⣿⡇
⠀⠀⠀⠀⠙⢷⣦⡀⠀⠀⠀⠀⠀⠀⠀⠀⠀⠀⠀⠀⠀⠀⠀⣾⡇
⠀⠀⠀⠀⠀⠀⠘⣿⠀⠀⠀⠀⠀⠀⠀⠀⠀⠀⠀⠀⠀⠀⠀⣽⠃
⠀⠀⠀⠀⠀⠀⢰⡿⠀⠀⠀⠀⠀⠀⠀⠀⠀⠀⠀⠀⠀⠀⠀⣿⠀
⠀⠀⠀⠀⠀⠀⣾⠃⠀⠀⠀⠀⠀⠀⠀⠀⠀⠀⠀⠀⠀⠀⢰⡿⠀
⠀⠀⠀⠀⠀⢸⡟⠀⠀⠀⠀⠀⠀⠀⠀⠀⠀⠀⠀⠀⠀⠀⣸⠃⠀
⠀⠀⠀⠀⢀⡿⠁⠀⠀⠀⠀⠀⠀⠀⠀⠀⠀⠀⠀⠀⠀⢠⡟⠀⠀
⠀⠀⠀⠀⣾⠇⠀⠀⠀⠀⠀⠀⠀⠀⠀⠀⠀⠀⠀⠀⠀⣼⠇⠀⠀
Planning & COncept
Animation Development & Plan
After doing all my research and some experimentation it was time for me to plan out my final piece and see how my thoughts have developed overtime. Initially, I chose this theme because there is a lot to work with. There are so many ways the afterlife can be interpreted and every single person has a different experience in how they view this topic. I also knew that it is a difficult topic to speak about for some people, so I needed to make this approachable and easy to digest for my viewers. There were also limitations in how I presented the afterlife. By choosing to follow the Christian beliefs as inspiration for my work, I was able to gather a lot of information as it is one of the biggest religions in the world, and also the religion that I grew up with.
Instead of presenting the exact view of heaven, I decided to be inspired by the approach of angels and their positions of work. I want the MC to meet an angel in the afterlife and the rest to be left up to interpretation as a way to include everyone in this topic. The story will follow a girl that is raised by wolves (inspired by my research of feral children) who commits sin yet still gets to go to "heaven".
Over the course of these few months I have managed to gain a good understanding in what I should and shouldn't include in my final piece whether it would be to not be offensive or for the best visual outcomes. I have also changed my views on the afterlife, believing that there is some sort of life after this one. I think that interacting with media and reading can be really useful to open up your mind and learn about interesting things that you usually wouldn't know unless you seek out for it. I usually say that I dread writing for projects, but it really is useful in developing my ideas and creating new ones.
I have decided to settle for a 3D animation using Blender and then to composite it with After Effects. This would mean I get the highest quality of work done that I am capable of, by both pushing myself to new things but also using something that I am familiar with for maximum efficiency.
Storyboard
This was surprisingly a really hard task for me. I knew the general idea of what I wanted to do, but putting it on paper was much more difficult than I had expected it to be. I had so many ideas that it got too much, I ended up with around 3 different storyboards all of which I didn't like. The main struggle I had was figuring out how she would die, and what sin she would commit. I came up with a lot of ideas but only a few seemed to fit these being: kills another person - dies in the cold, eats another person - falls down a cliff, kills another person - gets killed. After a lot of stress around this, I had an idea of cutting up the frames and scattering them on my table and then arranging them until I liked the outcome, checking in with classmates to see their opinions. It was then that I realised I shouldn't make the animation too gruesome to be as accessible to everyone as possible, but still be able to prove a point.
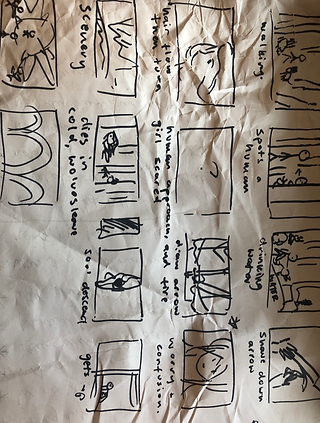

Storyboard 2
Scattered Frames

Final Storyboard
This is the final storyboard that I settled for. Although it isn't exactly what I had envisioned, it was the closest I could get. With this I am able to tell the story but also keep the work minimal so that I am not too overwhelmed and am able to create it with as much quality as possible. The more scenes I would plan for myself, the more rushed I would feel. I am quite behind on the project plan I had created at the very beginning, so I am not sure how much I can get done. Because of this, I will prioritise making certain scenes over others. I will make the ones that are crucial to understanding the story, and then continue on with others if I have the time left.
Concept Art
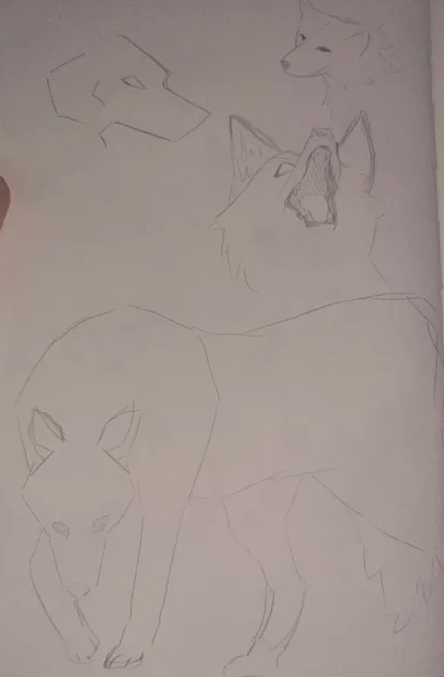
Wolves
For the wolf I hadn't done much art related to them so it was quite hard to get the hang of it even after trying to model one with plasticine. A lot of these look really out of proportion and strange which I am a bit annoyed about but at least I had some time to practice and see what shapes they are composed of. I tried to make them look both friendly and intimidating in some for variety. I think I will end up going with a more friendly expression.


"Heaven"
I kind of just wanted to put some ideas down on paper for this, as I know that my ideas will change overtime for this. I don't know yet if I want to make a more accurate depiction of the heaven described in the Bible or if I want it to be more generic in a way to include everyone's view on what happens after death. I also explored a little bit with the designs for the heavenly being that appears in the animation. The buildings I drew are heavily inspired by the artefacts I saw during the museum trip.


Main Character
For the main character I struggled a little with her design. I did a few quick sketches of some ideas but these didn't really stick with me, and I ended up creating full concept sheets for both her earth version and her heavenly version. This will be really useful for when I am modelling since I know where all the clothes and details go. When designing the earth version I kept in mind what I had learnt from my cosplay making, how fabrics and materials flow and interact with the body. I also had to keep in mind how her clothing would make sense, it had to be a mix of natural materials like animal hide for her skirt and bones for her arms, and gathered cloth that is used for her chest bandages. The colour scheme will be decided along the way, but it will probably be a mix of natural browns and beiges with red for contrast, which she could in theory have gained by dyeing materials with animal blood.
The heavenly version was simple to make, I wanted a interesting silhouette that was a little bit out there in terms of her calves and skirt shape. I don't know if I will give her the intricate designs on her model though as this would not only be a bit difficult for me but I also want to maintain a simple image, showing uniqueness through her silhouette only.


Final Design - V1

Final Design - V2

Modelling
Body & Face Modelling
Prior to this project, I had only attempted to make characters or even just simple bodies. I could tell that it wasn't really for me as I saw how much work goes into it and how specific you need to be with topology if you wanted to animate it later on. I was going to attempt making a character for my environment design project but ended up running out of time and had to scrap it. For my FMP I wanted to challenge myself. Even though it looks difficult, I still wanted to learn at least the basics of modelling bodies and characters.
To start this process off, I took a low poly body model that I had made a few months before when experimenting. I thought this would be a good idea as I can not only have a base to work off of to make sure the proportions were right, but I could also see the improvements I have made along the way.
This old model clearly wasn't the best so I couldn't use
it to make my project process easier. It was time to
challenge myself!
I first had to realise all the problems with this model:
- Strange topology
- Can't be rigged
- Too blocky, requires more detail
- T-pose needed
For the new model I also used several body model
examples that I had found on Pinterest to help me in
the process.

Older body model ^


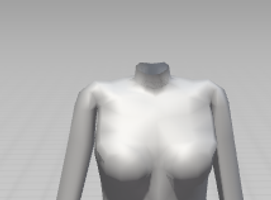

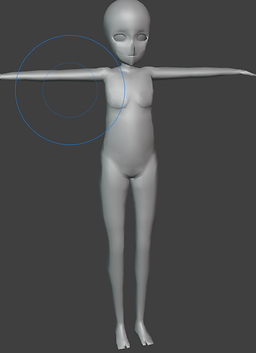
The majority of this model was made by extruding vertices and creating new faces out of them. It was tedious, but also resulted in something that I am extremely happy with. By following natural female anatomy and other references I was able to make a model with a stylised approach whilst also keeping my anatomy as accurate is possible, e.g. the lower belly pouch usually found on women's bodies. Throughout the modelling I was consistently rotating and viewing the model from all angles I could to make sure my work was going well and didn't have any mistakes that would be harder to fix later on. During this process I mostly struggled with the chest area and the arms, having to re-do it a few times to get a good enough shape.
After I finished the torso, legs, and arms, I
imported the model into Mixamo to make
sure it could be riggable and to see how
the limbs move. I had some issues with the
way the armpits and knees folded. After
researching a little I managed to solve the
issue as best as I could as I'm still fairly new
to modelling bodies let alone rigging them. I figured out that to get the best results you should lead 3 lines into 2 to get a good crease without it messing up. The shoulders simply required a little bit of moving around vertices and re-making faces to get the correct shape.

Normals Issues


This seems to be an issue that follows me around in modelling bodies since I had this problem in my last model too, but I only just now learned how to fix it. In the regular shade flat view the polys would look completely fine, however if I were to turn on shade smooth these weird lines and shadows would appear where I didn't want them. I was confused for a while, but then realised the issue was with the normals. When modelling for some reason the program tends to miscalculate which faces are inside and which are outside. In this case I had a few that were meant to be outside but were inside instead (orange = outside, blue = inside). The solution was very simple and I'm glad I learned this now, all I had to do was click a few buttons to recalculate the normals back to how they're meant to be. I ended up running into this issue quite a few times even later on so it's good I learnt how to fix it earlier on without giving up like I did last time.
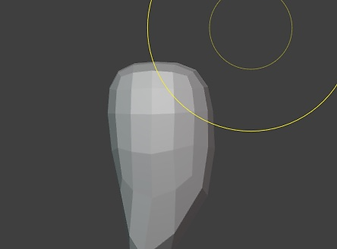
I have never properly modelled a face before, so this was a challenge to get through. I looked at some tutorials to gather a basic understanding and decided to follow one, however the result was completely different to what I had wanted to do. It looked alien-like and was not appealing to the eye at all. This method used modelling with vertices but also using some movement tools like movement curves which I didn't find comfortable using at all.


It looks extremely uncanny, the topology is quite messed up and the shape is weird overall. I did try to make it a bit better by sculpting but this didn't work either so I scrapped this model and decided to follow something new, this time I knew what to look out for and also learned a useful method. For the back of the head, I used a sphere as a separate object and then extruded and placed faces close to the sphere by using snap base. This was a quick and easy way of making a symmetrical shape for the head without much hassle, so I ended up taking this with me to my final model.
The final model was much easier to both understand and make. This process used blocking out the most important parts of the face (the mouth, nose, and eyes) so that the model could be structured and built around these. After doing this I had to go in and subdivide some edges. I needed the vertices between the outline of the face, mouth, and eyes to line up in order to get good topology, and constantly flipping between different views to make sure that the curves of the face are correct and not jagged. With the shape blocked out it was time to fill in the polys, which was a tedious task but fairly easy once I got the hang of it. Whilst doing this I had to keep the topology in mind, and continue to follow the curves of the face. I was already started to achieve the look I had in mind, much different to my previous attempt! This model has the look of anime style characters that I was going for: pointy nose, cat-like structure, big eyes, and an overall stylised look.


The topology for the mouth area might look quite crazy, but it was actually inspired by the character models from the game Guilty Gear. It uses a structure of tris to achieve the same look as other models, with less of a worry about properly calculating how many faces to use in order for everything to line up.
I (once again) had issues with the normals being inverted in random places but because I experienced this before I was able to resolve it quickly without worrying. I also selected vertex groups for the top and bottom lips just incase I needed to access them later without worrying about picking each vertex.

Axl from Guilty Gear Xrd


To finish the head off I just used the same method as I mentioned in my previous try. I am really happy with this result, I thought it was going to be much more difficult than it turned out to be, which I'm glad about. The only thing that was left to finish the head off was editing the normals as I was using a basic toon shader for the skin. It looked complicated, but was actually really simple. I needed to outline the corners of the mouth, the eyebrows, the eyelid creases, and the cheeks. By having several planes pointing into different directions I was able to copy and paste the vertices to create the look I wanted. The only issue with this was that if I were to edit the model in any way, even just by moving some edges, I'd have to re-do this process. I had to do this a couple of times, but it was simple and easy, just a bit annoying. To finish it off, I modelled some simple eyelashes and eyes to tie everything together and end up with the final head model that I used.


This the model that I will be using throughout my final piece, and I'm really happy with how it turned out. It looks simple, which is good because I wanted it to look clean and like it has taken inspiration from anime style models and drawings. If I need to create another character, I can simply adjust this one to make it different, whilst also being time efficient.
V1 Model - Earth
After finishing the base model, it was time for me to start on the first version of the main character. As previously discussed, this version is meant to represent her life in the wild living with wolves, making sure her materials are readily available to her. This was important to consider especially when texturing and modelling.
For the hair, I started with curves but then saw how big the poly count was which was around 2k per strand. I scrapped this idea and tried to do model with a plane, extruding edges and vertices, but this failed horribly. Because of this I switched back again to curves as this got me the look I wanted, and figured out I could turn down the resolution. This still had a high poly count of around 500 per strand, but at this point I didn't mind as long as I got it done and the final model didn't have an extremely high poly count. Shaping curves has a completely different set of hot keys which took a little while to get used to, it was also just hard to move them around in general, sometimes resulting in something that I didn't plan to do e.g. twisting the hair around. Because I was using the lowest resolution, the outline of the hair isn't entirely smooth, which bothers me but it isn't as noticeable when the textures were applied. I did have to end up leaving a bald spot at the top of her head but this was going to be covered up with a hat anyway so it didn't matter that much.


The skirt was fairly easy to make, I copied the face loop around the waist of the body and used this as a base for the rest of the skirt, making it much easier to shape it around her body rather than moving everything around individually. I took this loop, and extruded it down to show stiffness and for a general shape, then used the knife tool and make the general cut out I wanted for the front. For the rest, I moved around edges and vertices to get as close to the concept art as possible. The skirt is made up of 2 layers with the material being animal hide so I had to replicate this in my modelling, duplicating the base layer, making it slightly larger, and following the same process of using the knife tool and moving around certain vertices. Animal hide is thick and doesn't fall like materials that are usually used for clothes in modern times. To show this, the skirt is quite stiff and doesn't have any creases. I also left a gap to place in the fur.
At first, I was going to sculpt the fur in. However, I couldn't find any good techniques or brushes, and realised the poly count would be too high, as well as not fitting in with the look of the rest of the clothing. I then had an idea pop into my head, I extruded one vertex and left the 5 surrounding ones as they were. This gave me a unique look, whilst also being simple and fitting into the style of the rest of the model. After a while it was getting quite annoying having to do this for the whole way around the outer skirt, so instead I copied the section I had done and continuously placed it around the area, later on going in and attaching them whilst also adding in some more variation. This was quicker to do, but still gave the same look I was going for.
The accessories for the skirt were fairly easy to make, but I did have to keep in mind that I shouldn't make them too detailed as it would higher the poly count without it being seen up close. The armour plates at the front are quite lower in polys compared to the rest of the outfit because it is made of metal, I wanted it to look jagged and replicate the way a real metal would look, therefore I couldn't make it smooth and left it without shading smooth like I did for the rest of my pieces. The teeth were just a sphere that I sculpted down to make it look like a tooth, and the feather skirt was arranged with just 3 feathers to minimize poly count. The arrow holder on her hip was my favourite to make as it was simple, yet I needed to make sure the shape made sense. The back of it needed to be wider to fit the tips of the arrows, and it also had to be angled enough so that in theory the arrows wouldn't fall out.


The top and hand accessories were probably the easiest part of the whole model. I made the bandage using the same method as I did for the skirt, just by copying the faces I wanted from the base model and making it larger. I was going to use the mirror modifier to get both sides equal, but for some reason it kept clipping into one side which I found weird because I made the entire body symmetrical. I had to scrap this idea and thought of something different. I got a cylinder and curved around a general shape with the edges, loop cut it, and used shrink wrap to get it around as tightly as possible. This method was much quicker and easier, giving me the results I was aiming for.
Because the actual top is made of scraps, I had to give it a strange shape whilst also keeping functionality. The topology of this is really messed up, but I don't really mind because the top won't be animated. I know this isn't good practice, but it only affected this one part of the model. I make it drape naturally, I used the cloth modifier but had to do this several times whilst altering different aspects of the shirt e.g. the shoulders or the hem at the bottom. This made sure everything looked like it fitted properly whilst also being baggy.
For the arm accessories, I wanted them to act as some kind of armour, picking tough materials such as bone and hide. For the left arm I used a wolf's spine bones as reference, linking back to the fact that she lives with wolves. The rope around these took a while to figure out because I wanted them to be tied to her arm, however because of the complex shape I had to go individually move around edges to achieve the desired look. It doesn't look as good as I had envisioned it to be, but it still shows what I wanted it to look like so I'm not too bothered. If I were to remake this model, I would try to make the rope look a bit more detailed rather than just planes surrounding the arm. The bracelet on the right wrist used techniques that I had previously used in this model: using the base body and copying the faces I needed, and creating the fur by extruding vertices.


All that was left now were the fur boots and the wolf hat. There isn't much to the fur boots as I just used the same method previously mentioned, they were really annoying to do because it was so repetitive, but I just had to push through it otherwise they wouldn't match the rest of the model. In the future, I would like to make more detailed models which will probably have easier or more interesting ways to create different materials like fur.
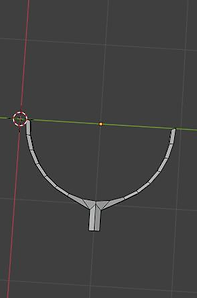
The wolf hat took some time to create. I do regret not modelling the wolf first and then using the head from that as it would've saved time, but I wanted to get this model done first. If I am doing something adjacent to this again, I would like to plan through everything properly before starting instead of going straight into it. To make it, I looked at some reference images of both real wolves and 3d models to get a grasp of how I would go about this. I modelled in a similar way that I did with the head of my character model, using vertices and making a general shape before filling in the rest. This ended up giving me the shape I wanted, tweaking it a little in the end. The fur design on the back of the hat was inspired by the Mystic Armour set in Tears of the Kingdom, using curves to get the desired shape.


Final Model

Overall, I am really proud of this model as it was the first full character model I have ever made. There are a lot of details that link back to the character and her lifestyle, especially with the aspects of honouring the dead shown through her accessories. A lot of people have said that this design reminds them of the movie "Princess Mononoke" which I have watched before, and didn't take any inspiration from, but also conveys the kind of aesthetic I had in mind so I am quite happy about that. I would've done a few things differently, like adding more detail from the start and planning through what I am doing step by step, but for my first I am very happy with it.
V2 Model - Heaven
Creating this model was much easier than the first, this is due to the fact I have now had some experience in making a character as well as this design being much simpler. I had more success in making the hair this time around as I knew what I was doing, and managed to not leave a gap on the top like I did with my first model. This model needed tidier hair, but to keep a similar look to the first one so that people knew it was the same character.
Because the hair is so simple and the colour palette is so bland, I needed to create an interesting silhouette for this model so that the design stood out. I decided to make the headband first as this was the most detailed part of the whole model. Whilst creating this, I had to keep in mind the poly count. I mentioned this before, I know that having low poly counts don't usually matter in terms of making animations, but I still wanted to keep good practice for when I go to university. I did run into a few issues with this part of modelling, mainly with the headband as this affected the rest. The hair for this model isn't symmetrical which made creating a proper headband difficult without moving around the hair. The headband is not symmetrical either, which make creating the spikes and details of the headband difficult. Any time I would mirror them, they would either float or not be on the headband at all. Instead of changing the entire base of the headband to fit the head, I ended up only moving down the bottom face so there wasn't a gap, giving the illusion that it fit properly. This in turn fixed my issues with the details and spikes.
Making the shoes and sleeves was easy and simple. I, again, used the method of copying faces from the base body model so that everything fit well. For the sleeves, I only really needed to move around a few vertices where the sleeves met the lower shoulders, and extrude some edges to reach the middle finger. The shoes were a little bit more complicated than the sleeves, requiring more attention to detail. Because I used the face copying method, I had very low polys to work with to make the design at the top of the shoes. They were meant to be more smooth and not so angled down, but I think I like them more this way as it contrasts the rest of the design, matching with the spikes on the headband. I also thought that the bumps on the calves were going to be hard to implement because of this, but as I worked I had an idea. I knew that I was going to use the toon shader, so I just used a sphere and sculpted it into the shape I needed, and merged it with the shoes. This meant I could have the design, but also not have to worry about it looking wrong or having too many polys. This wouldn't work if I were using proper textures, so I still need to learn how to solve these issues when the time comes, but for now this was going to have to do.
The design for the dress is quite basic, so there isn't much to say on this. I used cylinders for the 2 skirts, moving around edge loops to create the desired shape, cutting out the front for the larger skirt using the knife tool. The top was made using the same technique as the bandages for the first model, with just a few tweaks to make the pointy shape for her chest. The strip in the front is just a slightly deformed plane.


Final Model

Although simple, I like the way this model turned out because of the silhouette. Whenever designing characters, I would always stick with more complex designs that had simple silhouettes, so it was interesting to flip this around. I will definitely take this into account in the future, it made me realise that the details matter but not as much as the overall silhouette if I want to create recognisable characters that are simple looking. I also realised that I didn't give her ears, but this probably isn't that noticeable so I am going to leave it as it is.
Wolf Model
I didn't have any concrete concept art for the wolves, so I just worked off of what came to mind and references that I had on hand: my drawings, real life wolves, and 3D models of wolves. They all came in handy in their own ways even if I didn't fully reference an image. This project was my first time making anything related to wolves or 4-legged animals so it was definitely a challenge. If I had more time, I would've liked to study the anatomy of wolves, however because of the time constraint I just had to rely on visuals even if they were not accurate.
To model the wolves, I used the same method as I did with the face of my character model. I used vertices to get a general shape of the body and then subdivided for details and more definition. I will admit that the topology on this model is not the best, but I was also kind of rushing to get this done as soon as I could to start on my animation as I was behind on my work. When getting the general body done, I had realised that the spine was too curved to be accurate to a wolf's body. As I had learned before in my secondary research, wolves have straight backs when compared to that of a domesticated dog, which have curved backs. I fixed this, and also realised I should probably make sure the rest of the model was as accurate as I could get it, even if it was stylised. I ended up needing to move the front legs together a little, and make the chest more prominent. This really helped with making it look less like a dog, and more like a wolf. I'm glad that I decided to research these characteristics as it helped me later on, if I didn't I probably would've been stressing out not understanding what was wrong with the model.
At first, I was thinking of using the face from the wolf hat on my first character model, but after putting it in I realised that it didn't really match, and I would struggle making the lower jaw. Therefore, I made a new face whilst using the practice I had from the wolf hat. I kept the mouth open so that I could put in the teeth and tongue without struggling as much as I would if the mouth were closed. I tried to reference some images of wolf teeth to see where the bigger and smaller ones were located, but ended up making my own configuration of teeth.
I left the claws till the end, mainly because I forgot about them, but this was necessary to show that it was a wolf. I did struggle a little with these, the placement of them kept looking strange because the paws were not properly modelled due to trying to stay low poly. After a while, I managed to get them to look fairly decent. I don't like the way these turned out, but they are a small part of the entire model so I tried not to dwell on it that much. Making the fur of the body was the same method as I had used for my V1 model, this time trying to make it stick out more for dimension and a better silhouette.


Hunter Models
I made these models really quickly as they were only going to be visible in 1 scene. I reused my body model and sculpted around so that the body shape would change a little, I opted for a more square body shape as this could be interpreted as female or male. The clothing was made using shrink wrap, mirror, and cloth modifiers to achieve the final look. These designs were made up as a went along as I didn't think they needed much thought to them, they're only seen for a few seconds and won't have much movement. I also decided to texture them fully black but leaving only the eyes white. At first I was going to have the model in black and white so the clothes are visible but not detailed, but realised this would probably look quite bad from an outside perspective and I didn't want it to seem racist. The reason I chose to colour them all in black is to make sure the viewer isn't paying much attention to them, and that their focus is on the main character and her companions. In the main characters eyes, she has never seen another human before, therefore seeing them as threats. They do not register to her as important people, in turn making them less detailed shows this. I made 2 different types, one with shorter hair and one with longer hair. The hair designs don't look very natural, but this is to show that the story isn't set in medieval times but in the present.
I also modelled half a gun as this will be used in another scene that is meant to be handled by the hunter that lives, I didn't want to waste time making an entire gun as only half of it will be visible. I used a hunting shotgun as inspiration.


Heavenly Being Model
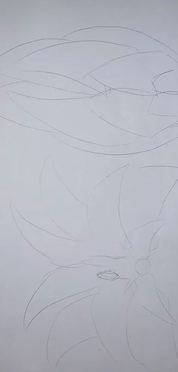
This model I also sort of made as I went along, but it was mostly following a concept I had made earlier on. The being is heavily inspired by Seraphim angels in terms of them having 3 pairs of wings and being the highest ranking angels. If I were following in accordance to the Bible for this story, I would've used one of the angels that are in charge of admission to heaven and in contact with humans arriving to heaven. However, I wanted to stray away from representing the Bible word for word, going for a approach that is only slightly inspired by it. The construction of the wings was really simple as I had experience from making them using cardboard earlier, all I had to do was follow a similar process of making a couple different feathers with different shapes and sizes for variation, and arrange them in a way that made sense. I made 3 pairs of these with slightly different shapes to each.
The actual being itself is a copy of the body model I had made, I changed the colour of the skin and eyes whilst also changing the shape of them to look more sleepy. I then added some bottom lashes, making the being look different from the main character whilst minimising the time I needed to spend on it. The hair was modelled in the same way, I tried to make the shape a bit stranger than a normal character, I then coloured this purple to oppose the yellow I had used for the wings. I am quite happy with how this came out even though it is simple and not really what I had expected to make, but with a time crunch I had to make it work.


Environments
I decided to group my environments into one section as a lot of them use the same models and props. For easier but still detailed environments, I used a Blender add-on that creates mountains using noise textures that I tweaked using the different options given. I used several different types of noise to create the backdrop for 2 of my environments: Mountains and Lake. I also created some powerlines to show that this story is taking place in the present, not in the past as this could get confusing for the viewer due to the fact that she is living in the wild.
The trees were probably the hardest to make as I experienced a lot of issues with them, I tried my best to make them look like pine trees that would be seen in cold climates. I used vertices and extruded them to create the shape I wanted, then used the skin modifier. This caused me some issues like rat nesting which I didn't expect as I have used this method before and it turned out perfectly fine. Even with shade smooth it looked really weird, the shader was the only thing that saved it and made it look fine. The most frustrating part was adding the snow to the trees. I used another modifier on Blender that produces snow on objects, but this only worked for one of my trees, the rest would mess up really badly and just now add anything on. Although annoying and tedious, the only way to fix this issue was to copy and paste the snow onto the other trees, rotating and scaling to fit each one. This took a while, and it looks really repetitive but I had no time to make it look much better especially since I was so annoyed with it.
I am still fairly happy with how these environments turned out as they do their job, regardless of how high the poly count is.


Texturing
I textured my models as I went along because I knew that I would use a simple toon shader on my models anyway. This helped me see how the characters look as I go along to see if I should change anything before moving onto another aspect of the model which made my process a lot smoother. I do admit that this isn't my best texturing work, however this is the look I was going for. In the future I would like to experiment more with shaders and textures on my models both environmental and character.
The only more complex shaders I had created were the mountains, sky, and wings. For the mountains I used a toon shader that automatically detects how high up a surface is, and places the shader according to that. The sky was a HDRI with a toon shader on it detecting the darker spots and applying it to look more cartoony. For the wings, I used a painterly shader which might seem a bit out of place in contrast with the everything else being toon shaded, but it surprisingly worked quite well. I wanted more variation, but it only made sense to apply it in the heavenly scenes as heaven has things and colours that you have never seen before.